Sunday, September 27, 2015

One layer card for the Rubber Buggy

Hi everyone!

I'm here with another card for The Rubber Buggy.
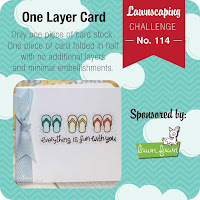
This card is inspired by Lawnscaping challenge #114 - one piece of card folded in half with no additional layers and minimal embellishments.
http://lawnscaping.blogspot.se/2015/09/hi-there-welcome-back-to-another.html 
Hmmm... I'll have to admit I went abit OTT with this one in the end...
I should have stopped both 1, 2 and 3 steps earlier. This could probably have been 2 gorgeous cards - LOL! 

At first I was a bit challenged, I was having trouble to see how I would make my card not seem empty or flat. But then I went to pinterest and o'boy! I find that the danger with pinterest, like overall the wireless crafting community, is you spend hours oh-ing and awe-ing. But in the end you get nothing done. Anyone with me on this?

 
But over to the card itself. I made the background scene with distress ink and post-its. I cut a hillshape from the post-it and used that as a mask. I then tried to create soft shadows and depht. I don't know about you, but it never seem to work out until the card is almost done, before it comes to life... I then used the tree from my latest stamp set from Lawn Fawn, Toboggan together, but if you look closely, you'll notice my first mess up.

I didn't mask the trees thus, as I was aiming for a cluster of tree tops, I stamped over the crisp white edge. It may be that I'm the only one bothered by this... To me it still looked a little empty, but I really could have stopped here. However, my baby was still sound asleep, so I kept going... I created a branch in the foreground using Deck the Halls by Lawn Fawn, this is a stamp set that will never go out of style. I even added a bit of clear wink of stella to the pine cones, so they are nice and shimmery.


Now that I had started to get the hang of things, I started to play with all the snowflake sizes in the sets. So I started with the smallest from the top left using third generation stamping and then the further right I got, the larger the snowflakes became and I now use second generation stamping. The only first generation stamping I used for the snowflakes (beside another little boo-ho, which I hope you wont notice) is the large snowflake from The toboggan together set.


Well how about stopping now? I'm a bit unsure of how the depht looks to anyone who is not me, but it is certainly not empty at least. But no, if only my baby had woken up now - LOL!
I had to get a sentiment in there... As I had, up til now, still not had the chance to play with Ranger's embossing powder in liquid platinum... 
Let's just say - I'm not happy with the placement of the sentiment and leave it at that...

Many thanks for visiting and bravo if you read it all :D

Small ink blending tool (I wish I had these)
Masking paper (or use post-it)

Challenges entered:
Lawnscaping challenge - #114 one layer card (inspirational photo above)
Simon says stamp Monday challenge - Use a stamp (and hop hop among Stamptember inspiration)
Simon says stamp Wednesday challenge - No designer paper

Tuesday, September 22, 2015

Thank you card for The Rubber Buggy

Hi everyone!

I'm here with a really simple card for The Rubber Buggy.
I've used a lot of second generetion stamping here, I like the subtle effect you get.
I've used Lawn Fawn ink pad hippo and you can see partial bits where I've used first generation stamping to add a bit of dimension.


Both the "little" Thanks and the "larger" Thank you are parts of the same stamp set. This set is just so versatile. You can put together sentiments for just about all occastions. You might have seen that I've used this stamp set in my pocketed scrapbooking. Putting together the sentiment "Thanks a bunch" for when my son sunk his first teeth in my finger - LOL! If not, you find that post HERE

Back to this card. I wanted the main "Thank you" to really pop, so instead of using another dye ink (ie lawn fawn liqrice) I used an archival ink. You could also use stazon, but I find that ink so tiresome to clean. I only have babywipes, but if you had some stamp cleaner it'll probably be just as fast.


Products used from the store:
Wplus9 design studio clear stamp set Handlettered thanks
Lawn Fawn ind pad Hippo
Ranger archival ink Jet black
Neenah cardstock solar white
Stamping supplies (acrylic block, doublesided tape, bonefolder)

Thank you for visiting!


Challenges entered:
Simon says stamp Monday challenge - use a stamp

Thursday, September 17, 2015

DT-package and order from The Rubber Buggy

Hi everyone!

I'm here with an unusual blogpost today.
I normally doesn't share my DT-packages and orders on my blog, but rather on my Youtube - though not always...

But I was so super happy with this one I promised in my video I would put the links to all product in a blogpost. So here it goes, just remember - everything is from The Rubber Buggy:


Stamps:


Lawn Fawn Toboggan together stamp set
Lawn Fawn Togoggan together coordinating dies
Lawn Fawn Sweet Christmas stamp set 
Lawn Fawn Sweet Christmas coordinating dies

Love these stamps so much, I so happy you get so much result and effect with so little effort. They are superquick to color - great, since my crafting time has been way limited and that's me on maternity leave. I have no idea what will become of me when I go back to work - LOL!

I admit, you might find the coordinating dies a bit much if you don't have the budget. Since they are so small they are quickly fuzzy cut. I agree, especially if I were only to cut one piece for a project. However, I tend to multicolor a whole lot of them and keep for later, thus I find it really clever to be able to cut all out at once.


Paper:
Lawn Fawn Let's Polka collection 12x12
Lawn Fawn Beachside collection 6x6
Lawn Fawn Beachside collection 12x12
Lawn Fawn Let's bokeh in the snow collection 6x6
Lawn Fawn Let's bokeh in the snow collection 12x12

As I mentioned in my video, the 6x6 papers are not doublesided, but the 12x12 papers are. I think I would almost have preferred if the 12x12 papers were singlesided too, since I'm going to have a hard time deciding what side I'm going to use - LOL!

Loving the manufacture strips on all papers, so you wont see me throw those away.


Stamping supplies:

Lawn Fawn ink pad soot
Ranger embossing powder Liquid platinum

Honestly, I haven't had time to play with the embossing powder yet. But I will soon, as I have an urge to make Christmas cards again - LOL!

But the soot ink pad works splendid. I find it more to be a really dark brown, but nonetheless brown and not at all black. I hope that they will make a really dark grey-blue mix too. That would really make my day. Or do any of you have any great tips for a really really dark blue, almost black?


Thank you for visiting and if you watched my video!


Tuesday, September 15, 2015

September Christmas card for The Rubber Buggy

Hi everyone!

I just had to make a Christmas card :)
For me it's just great to make them early - although I have to admit, this is probably the earliest I've started. This time I was in the mood for a night sky and playing with my distress inks.


I have used an older Memory Box tree scene from my stash, but imagine how cute it would be with this winter scene from Wild rose studio if you'd like to make a similar card. Can you see where I have used the Lawn Fawn stamp set Deck the Halls? The larger trees in the background is embossed using the largest branch from the stamp set. I just masked off the rounded tip. The smaller embossed trees in the middle of the card is the other two branches from the stamp set. I then used the dotted line from the stamp set and created a border on my white piece at the front. Since it is a clear stamp and it's so long and thin, you can manipulate it some to follow a curve line.

I'm so, so happy with my night sky. I even managed to make little tiny droplets all over the sky with perfect pearl water and not great big blobs. But leave it to me to mess upp the embossing...  Well, well... At least the stamped border looks fine...


Products used from The Rubber Buggy store:
Distress ink Evergreen bough
Distress ink Chipped saphire
Distress ink Iced spruce
Lawn Fawn stamp set Deck the Halls
Lawn Fawn stamp set Snow days (the sentiment)
Ranger embossing powder Superfine white
Ranger embossing powder Superfine silver
Lawn Fawn ink Hippo
Ranger Perfect pearl Biscotti
Stamping supplies (acrylic block, distress ink applicator, doublesided tape, neenah cardstock)

Thank you for visiting!

Challenges entered:
http://lawnscaping.blogspot.se/2015/09/lawnscaping-challenge-texture-sponsored.html
Lawnscaping challenge #113


Simon says stamp Wednesday challenge - Use a stamp 
Simon says stamp Monday challenge - love this technique (distressed background, stamping, embossing, layering)

Tuesday, September 8, 2015

Bokeh Birthday for The Rubber Buggy

Hi everyone!

First, let me just tell you how much I'm in love with bokeh pattern...
I'm currently hoarding all papers I can get my hands on.

So imagine my delight, when I discover that you can make your own paper...
Yes! I'm always the last to know - LOL!


For my background I pre-watered my watercolor paper and then used my paintbrush to move the ink to the paper and randomly dropped it in different places.

When the paper was dry, I made my own stencil using circle die cuts from Memory box, I used the four smallest circles. But you can also use the stencils from memory box HERE and HERE to achieve the same look. Lawn Fawn has also in their recent release a stamp set for you to easily create this background, you can find that stamp set HERE. Don't worry where you put the circles, it'll come together. I put some in different sizes all over the paper. Some hanging off the side, some overlapping etc. I actually had to assembly this card, before I liked it.

The sentiment is from a Kaisercraft clear stamp and I have masked it, so I was able so seperate it into two parts. I really like it like that. The dark gray layer that I've used as a mat is me recycling packaging.


Products used from the Rubber Buggy store:
Watercolor cardstock
Distress ink mustard seed
Distress ink refiller peeled paint
Distress ink refiller dried marigold
Lawn Fawn pigment ink Yeti
Memory Box open studio die stitched circle layers
Kaisercraft clearstamp Birthdays
Lawn Fawn ink freshly cut grass
Lawn Fawn ink liqrice
Neenah cardstock Solar White
Stamping supplies (ink applicator, doublesided tape, acrylic block, paint brush)

Thank you for visiting!


Challenges entered:
Simon says stamp Monday challenge - stamp & punch/die cut
Simon says stamp Wednesday challenge - Make it colorful

Tuesday, September 1, 2015

2015 December daily 1 (The Rubber Buggy)

Hi everyone!

I'm here with the first update of my December daily 2015 :D
I know, I know I'm early. But I figured I needed all the time I can get.
For more information about the set up, please check HERE.
I'm using pocketed scrapbooking 12x12 design A and my intention is to have a whole page per day.

So far I managed to get the first 3 date cards done. I figur I better start with the date cards. That way, at least part of each day will have some decoration.


My aim is to have at least one or two photos per day and a bit of journaling. That would allow for some filler cards to, so I better get going - LOL!


Products used from The Rubber Buggy store:
On all cards
Lawn Fawn 12x12 collection kit snowy days
Memory box die open studio stitched circle layers
Ranger embossing powder gold tinsel
Stamping supplies (Acrylic block, adhesive etc)

Dec 1
MFT die-namic let it snowfall
Magnolia 12x12 paper Vintage Christmas ice princess
Lawn Fawn ink pad Deep sea
Lawn Fawn ink pad hippo

Dec 2
MFT die-namic decorative doily (no longer available)
(similar die) MFT die-namic dainty doily
Memory box landscape boarder (mine is an old one, but there are similar from the store HERE & HERE or Wild Rose Studio has a differnt scene HERE)
Magnolia 12x12 paper Vintage Christmas Red noel
Magnolia 12x12 paper Summer memories, Scandinavian map
Lawn Fawn ink pad Deep sea
Lawn Fawn ink pad hippo

Dec 3
Lawn Fawn stamp set snowy days
Lawn Fawn coordinating die set snowy days
Ranger archival ink Olive
Copic marker
Magnolia Doo-hickey die sprawling Fern


I'm super pleased so far :D
But I would love to here what you think or if you have any tips & tricks.

Thank you for visiting!